Working from Home
Did you know that when you hire to have an Airstream professionally renovated, they ask for a minimum of 6 months of working time? That is 6 months in a 30,000 square foot facility with 25 technicians. We allowed ourselves 7 months, with 2 of us working after hours with no facility to protect us from the weather. So... obviously we are not talking apples to apples, here. We are not doing the same quantity or quality of work, but we ARE feeling a time crunch.
With our trailer being 100 miles from our home it makes it harder to escape to work on the little tasks. Our solution: HOMEWORK. If we need to work on smaller pieces that are already removed from the trailer, we bring them home to work on during our off days and while the kids are napping.
1 - Cushions. There something nerve-racking about cutting into $80 worth of vinyl and hoping that I don't mess it up. Things that are scary: zippers, cording, thick rubbery material. The thing that I did not account for was that you cannot iron vinyl & you really don't want to pin it too much, either. I really wrestled with the zippers for this reason. I tried a new technique on each cushion. The best solution was to sew down the fold instead of ironing and THEN sew in the zipper. I went through a ton of thread on these. The cording was tricky around the corners because it was so thick. There were some touchy moments trying to get through 8 layers of vinyl where the cording finished up- but I made it! Actually, I made it through ONE set (four cushions). I am still waiting on the measurements for the living room pieces.
The first Airstream cushion
2 - Screens. One was missing. One was ripped. All of them needed spray painting. I watched a couple of youtube videos and went to work replacing the missing one. Some spots were easy-peazy, for the other, I was glad to find a metal spline roller in the basement instead of using the plastic one that I bought. By the time I finished the one, the kids were trying to "help" so I had to call it quits for the night.
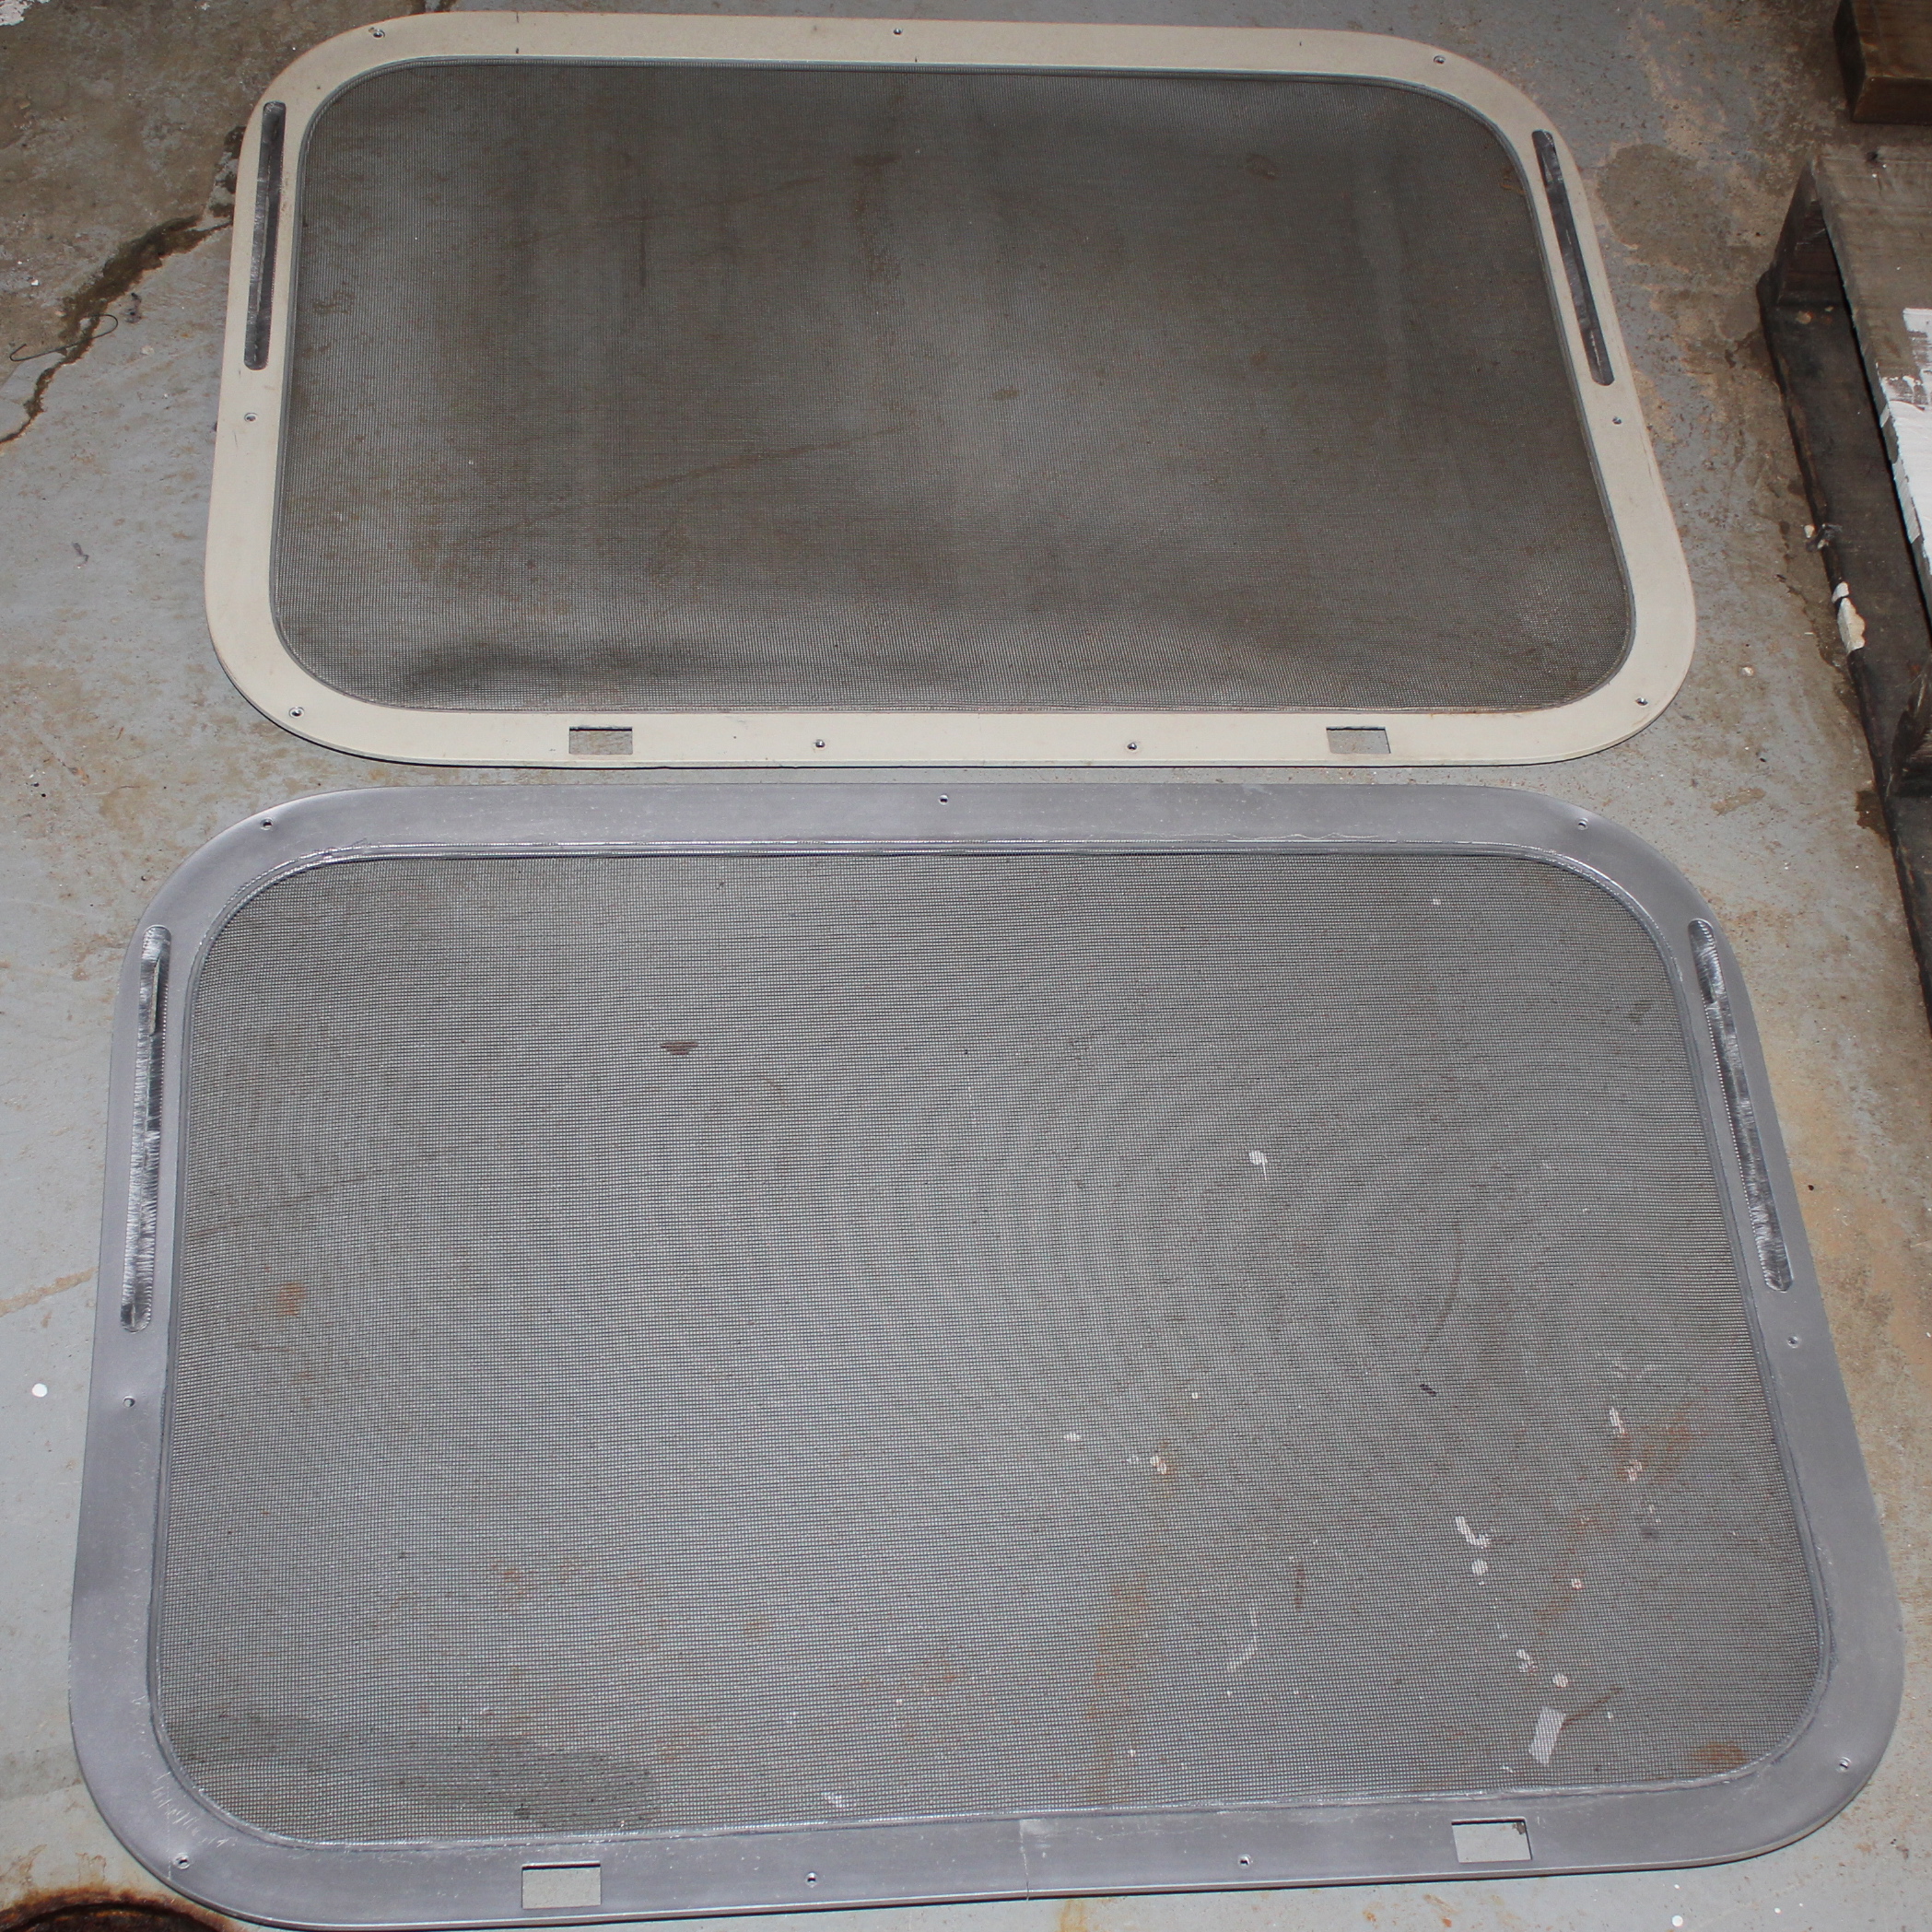
Original cream colored screen vs. newly repaired & silver painted screen.
3 - LED conversion. Michael and I had some family bonding at the kitchen counter working on these. Basically we are using the existing frame and switch and adding 10 strips of stick-on LED lights to the frame. I have no clue what we are doing. They stick on, right? How hard can it be? (The sticking part was my job). Michael has a better understanding than I do. It has been a while since he has really worked on electronics. Fifteen years, maybe? He got to practice up on his soldering skills. The first one is always the biggest learning curve. It may have taken us a few trial & errors, but it works! Now we are ready to get the assembly line going on our next free day. The remaining ones should go much quicker!

Michael soldering the first light fixture
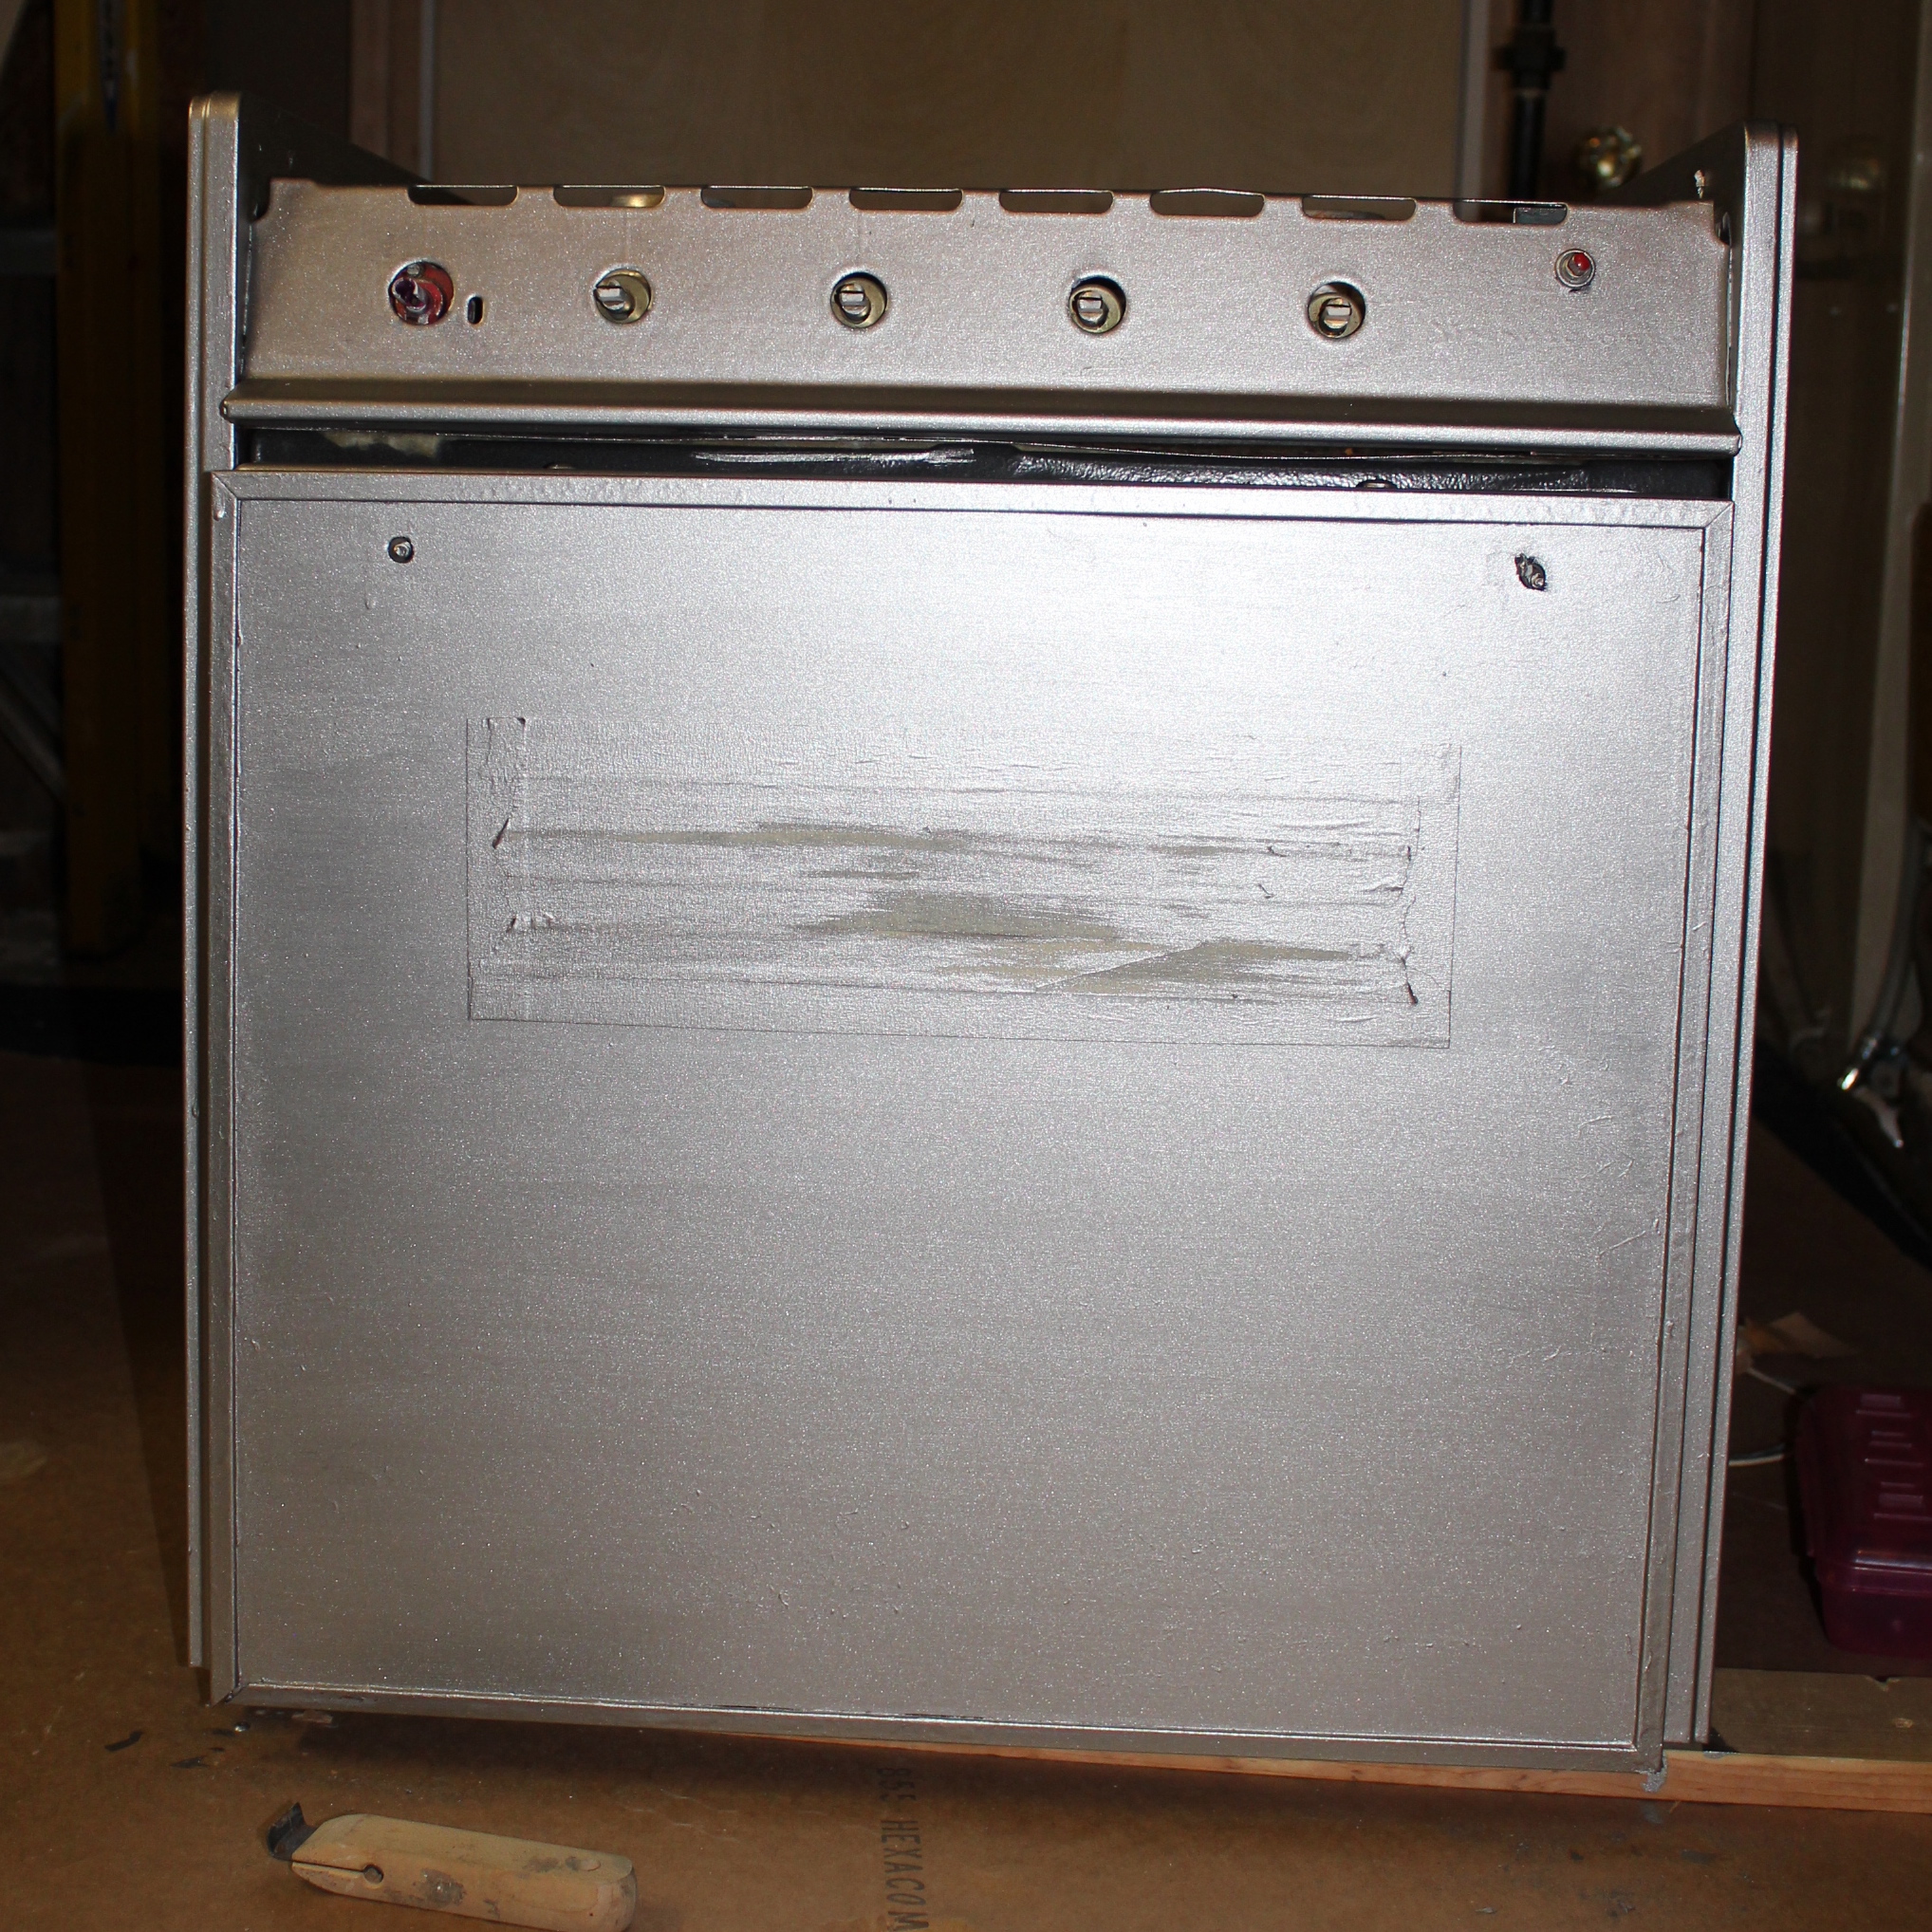
4 - Liquid Stainless Steel. More painting. We decided to go this route so that we could keep the existing fridge and stove and have them match. We also needed a solution for the counter tops. This would cover them all with one product. I had already watched the videos and realized that we were looking at 7 coats of paint and 2 weeks to cure after they were done. I decided right away this was going to be homework.
The 7 coats of paint technique is for real. After you paint one coat, you have to drag a dry brush over it, removing all of the excess. This made really streaky, extremely thin coats of paint. After 3 coats there was still light streaking. I did not use this technique on the primer, since it was just regular primer, and that was a mistake. The stove front was glass. I had sanded it with steel wool, primed it, and let it dry for 24 hours, but when I painted and used the dry brush on it, the layer of primer came up in spots. I must have put it on too thick. I thought I could get by adding coats of steel paint, but you could see the strings of primer getting stuck as raised pieces in the finish. I decided to pause, let it cure, and scrape with a razor blade before doing the final coats. At first I was worried the "large" kit would not cover the surfaces since it was only 1 quart of paint and so many coats. The thin coats don't use much paint, so after finishing the stainless steel layers, I still have about 1/3 of the quart of paint left. That is a QUART of paint, not a gallon! I am waiting 2 hours so I can start applying the 3 layers of clear topcoat.


Those are the projects that we are trying to get done before Spring Break. We are hoping to bring the whole family and make some progress that week. Of course we will be taking a break from work to honor Holy Week, too. Balance, right?
-Michelle